Charging Procedure
One of the great advantages of a Lithium-Ion battery is it has no memory effect, which means recharging a partially charged Lithium-Ion battery is not harmful. Also, partial discharges with frequent recharges are much healthier than one long deep discharge. By charging Lithium-Ion batteries more frequently, the life of Lithium-Ion battery will be longer.
Charging process at home:
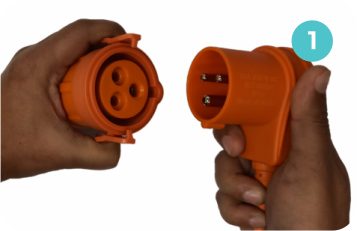
The Charging Cable provided with the vehicle is having standard IEC 60309 male connector which can be used while charging from AC 001 specified public charger. For home charging, connect the given 3-pin adapter to the male connector. Only use this cable for charging the Lithium-Ion battery in your Vehicle. This cable has been designed with protective circuits to prevent any danger and to charge your vehicle safely. Ideal time for charging is during night.
- Keep the vehicle either on main stand or on side stand. It is recommended to park the vehicle in shed. Do not charge under the snow.
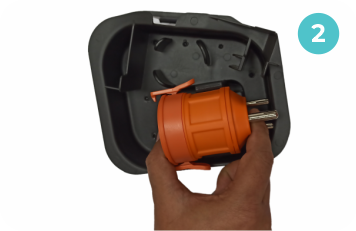
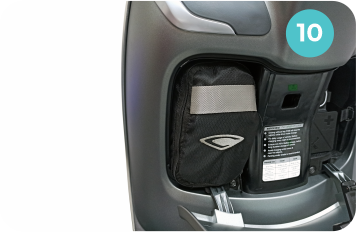
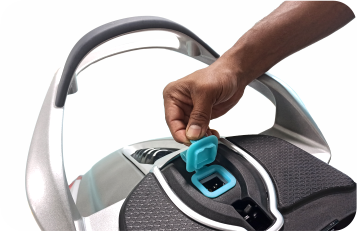
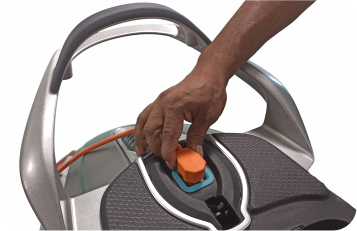
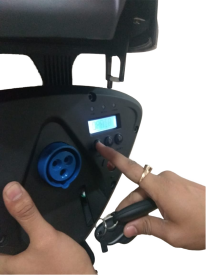
- Open and lift the seat. Open the charging port flap on the vehicle.
- Plug in the 3-pin male connector of the charging cable to the 6 Amp, 230 V power supply source. This power source should be protected by an upstream MCB of 10 A rating and properly earthed.
- Connect the 3-pin female connector of the charging cable to the charging port of the vehicle. It is recommended to route the cable below the grab handle. Always ensure that the charging plug is fully inserted in charging socket.
- Plug in the 3-pin male connector of the charging cable to the 5 Amp, 230 V power supply source. This power source should be protected by an upstream MCB of 10 A rating and properly earthed. It is recommended to use the wall charger supplied along with the vehicle as this offers additional protection and security. Refer instructions in the next topic for details regarding connection from wall charger.
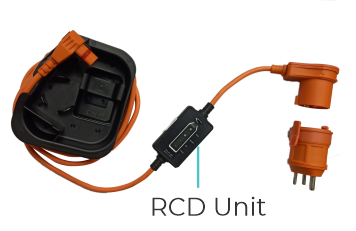
- Switch on the power. Green LED on the RCD (Residual Current Device) unit at ‘OK’ text will turn on which indicates power supply is OK.
- Charging will start automatically.
- If the charging port is connected while the vehicle is in OFF condition, then the instrument cluster will be displayed for approximately 2 minutes and then it will turn OFF.
- If the charging port is connected while the vehicle is in ON condition, then the instrument cluster will show the symbol of charging port connected.
- While charging, the State of Charge Bar will increment progressively on the instrument cluster & Battery charging telltale (green symbol) will continuously blink until charging is completed. The handle and the seat can be locked while the vehicle is getting charged. However, during charging, handle cannot be unlocked. To unlock handle power supply has to be discontinued.
- The charging status and the charge on the vehicle can be checked either on the vehicle dashboard or on the mobile app*.
- The charging duration required for first time full charging is approximately 5 hours. During subsequent charging, the time to full charge will depend on the State of Charge. However, the charging duration may vary depending on external atmospheric conditions as well as variations in supply voltage.
- Once the charging is completed, the charging stops & vehicle switches OFF automatically.
- Switch OFF power supply and first disconnect plug from power supply socket then open seat to disconnect charging plug from vehicle charging port.
- If high temperature symbol is displayed and if battery charging indicator is blinking, it indicates that battery cooling fan is running. Charging will start automatically when the battery temperature comes within predefined safe limit.
A test button is provided on the RCD unit to check the functioning of AC mains relay. Follow the below steps to test:
- Connect the 3-pin female connector of the charging cable to the charging port of the vehicle.
- Plug in the 3-pin male connector of the charging cable to the 5 Amp, 230V power supply socket.
- Press the TEST button. The Red LED will glow and the power at the output end will turn OFF.
- Now press the RESET button. The Green LED will glow, and power supply will be restored at the output end.
- This means the RCD unit is functioning correctly.
Note:
Charging is automatically controlled by the vehicle Battery Management System ensuring maximum life of battery. User cannot change any set of himself. Sometimes the cooling fan may start operating automatically based on the temperature control mechanism of the inbuilt battery management system. This is a normal.
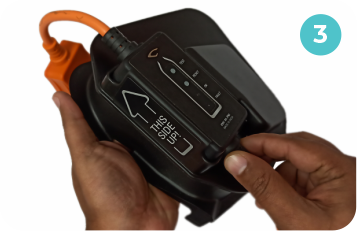
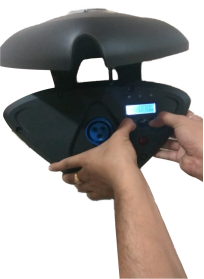
Pairing & Unpairing of Wall Charger with Chetak Key
- Once the Wall Charger is installed, it has to be paired with the Key of Chetak.
- Open the Wall Charger Lid using the manual key provided along with the Wall Charger. It will be displayed as “ nOPAIR “ on the screen. Remove the manual key and don't use this manual key in the next steps hereafter. Keep the manual key somewhere safely.
- To Pair - Hold the first Key (anyone of the 2 keys provided) within 50 cm distance from the Wall Charger and press the “PAIR” button (left most button of 3 buttons provided) of Wall Charger
- After pressing the “PAIR” button for a short while, remove your finger. Blue light would then start blinking for 10 seconds which means it is ready for pairing and is waiting for signal to be received from Key.
- While the blue light is blinking, single press the button provided on the Key within that 10 seconds (Ensure the key is within 50 cm from the wall charger). This process will pair the key and "PAIR-1" would be displayed on the wall charger screen. This Key, which has been paired first, is the Master Key for Wall Charger. If Key button not pressed within 10 seconds, the entire process must be repeated.
- Close the lid by pushing the lid against the Wall Charger (Do not use manual key) and ensure the blue light on the Wall Charger glows continuously now. If the blue light on the Wall Charger doesn't glow, again open the lid by pressing the button in the bottom portion of the Wall Charger and check if the blue light glows on the Wall Charger. Once the light glows, it means that the Wall Charger is now ready to charge.
- For pairing the second key with the Wall Charger, close the Wall Charger Lid by pushing the lid against the Wall Charger (Do not use manual key) and again reopen. Now press pair button on the Wall Charger. Again, it would start blinking for 10 seconds and press the button on the second key within the 10 seconds while the blue light is blinking. 2nd Key gets paired with " PAIR-2" getting displayed on the screen. If Key button is not pressed within 10 seconds, the entire process must be repeated.
- After pairing, every time Wall Charger should be opened with the open button provided at the bottom right side of the Wall Charger keeping the Key within 50 cm from the Wall Charger for charging the vehicle. Ensure the blue light is glowing every time you start the charging process. Please note that the Manual key of Wall Charger should not be used.
- For Un pairing, the Master key (Which was paired first) needs to be held close to Wall Charger.
- Press the “open” button at the bottom right side of the Wall Charger.
- Press both Pair button (left most button) and Un pair button (Right most button) simultaneously for more than 12 seconds.
- Blue light will start blinking and message “ P – CLR” will appear on the LCD screen provided in the Wall Charger.
- This states that all paired Key data has been erased / deleted from the Wall Charger. Now, Wall Charger cannot be used for charging until any Key is paired.
- In case of Master key lost or both keys lost, Kindly contact nearest Authorized Bajaj Chetak Dealership for support.
 Danger
Risk of electric shock
- Connect charger power cord to an outlet that has been properly installed and grounded in accordance with all local codes and ordinances.
- An electrically grounded outlet is required to reduce risk of electric shock. Do not use ground adapters. Do not modify plug.
- Do not touch uninsulated portions of output connector or uninsulated terminals.
- Disconnect the AC supply before making or breaking the connections to the battery.
- Do not open or disassemble On Board charger or any vehicle parts.
- Do not charge vehicle if the AC supply cord is damaged or if any parts (eg. Charger) has received a sharp blow, been dropped, or is damaged in any way.
- Refer all repair work to Authorized Bajaj Chetak Dealership.
- Vehicle charging is not to be carried out by persons (including children) with reduced physical, sensory or mental capabilities, or lack of experience and knowledge on electrical systems and battery charging, unless they have been given supervision or instruction concerning use of the charger by a person responsible for their safety.
- Children should be supervised to ensure that they do not play with the charger cord while vehicle charging.
 Warning
- Do not modify / change any parts of vehicle. Use as mentioned in Owner’s Manual only.
- Do not access any part of On-Board charger. This may cause personal injury and damage.
- Keep sparks, flames, and smoking materials away from vehicle.
- Provide adequate ventilation during charging.
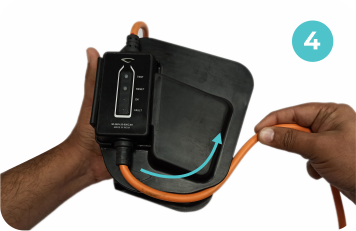
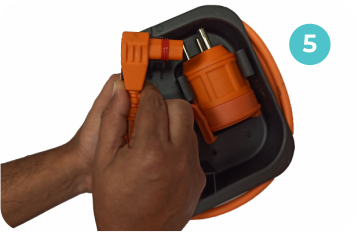
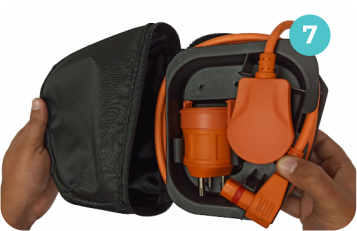
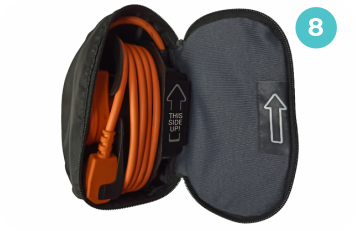
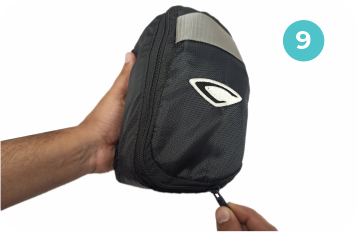
How to wrap the charging cable