Information about operational parts
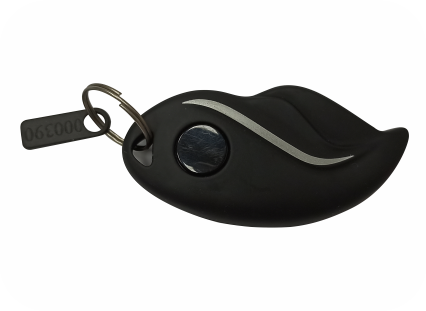
Key:
- This vehicle has been designed to be operated using a remote wireless key.
- The key should be within 1.0 ~ 1.5 meter of vicinity to unlock, to operate the control switches and to drive the vehicle.
- To locate the vehicle in public parking, press the button on the key which will flash the vehicle indicators.
- If the vehicle is driven away during ON condition without Key, as a safety measure the vehicle keeps running and nothing abnormal happens. However, once switched to Neutral, it cannot be put in Drive mode. Also, after it is locked, it cannot be unlocked.
- If the vehicle is parked in locked condition, and someone tries to move the vehicle, a warning message will appear in mobile app*.
- Do not keep key in glove box or helmet box. Other objects which have been kept in the glove box can affect the operation.
* App is not mandatory for proper running of the vehicle.
Below are the steps to replace battery of the key.

- It is recommended to purchase a genuine battery. It is a 3-volt coin cell battery CR-2032 (the circular flat silver ones).
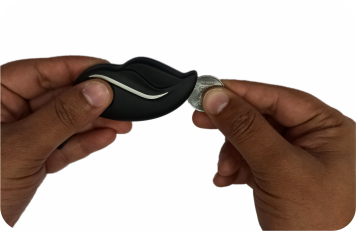
- Open the two plastic cover of the key with a coin. Be careful to hold the key together, so that the contents and external button don’t fall loose.
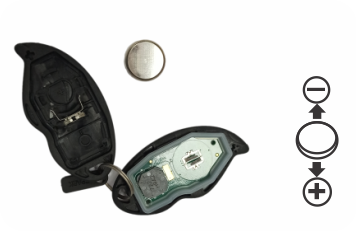
- When you remove the dead battery, take note of the positive and negative sides. Also, try not to touch the battery terminals and electronic components, as the oils on your skin can cause corrosion which can shorten the life of the battery.
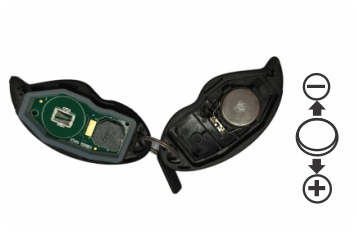
- Insert the new battery in the same position as the old one. Use the positive (+) marks inside the key as a guide.
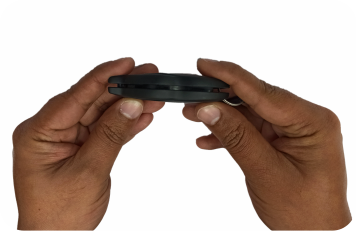
- Align the two cover of the key and gently apply pressure until you hear it snap together.
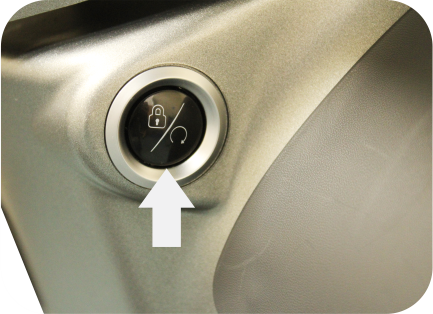
Vehicle Start-Stop Switch:
- From the vehicle locked condition, short press to unlock & wake up the vehicle.
- In switch ON condition, double press to switch OFF the vehicle without locking the steering.
- Long press, with steering on any side, to lock the vehicle and to switch OFF.
- Short press to bring the vehicle from drive mode to neutral.
- During charging, In the presence of key, if start/stop switch is pressed, then instrument cluster will turn on for a few seconds to display the charging status.
Note: Do not abuse start-stop switch with high frequency on-off cycle.

Note : Pinch for Image Zoom In/Out
Instrument Cluster Details
- Battery Charging: Indicates lithium-ion battery is getting charged or battery getting cooled prior to charging
- Low Voltage (Auxiliary Battery): Indicates that the voltage of auxiliary battery is low Vehicle may shutdown unexpectedly
- State of Charge Bars: Number of Bars indicates State of Charge. Progressive increment of State of Charge bars indicates that the Li-Ion battery is charging. When the vehicle is kept for charging, if the fans are running to cool the battery, charge telltale may blink but State of Charge bars may not increment progressively.
- Range: Indicates the remaining Km vehicle can run, based on previous driving pattern & road condition.
- Time to Charge: Indicates the time to full charge.
- State of Charge (Li-Ion Battery): Indicates the state of charge.
- Odometer: Indicates the odometer reading.
- Tripmeter: Used to record the distance travelled. To reset the tripmeter press M button to display the tripmeter icon. Then long press the M button to reset the tripmeter to 0 Km.
- Generic Alarm: Indicates malfunction of system.
- Drive Mode: Indicates the drive mode of the vehicle.
- Neutral: Indicates that the vehicle is in Neutral.
- Speed: Indicates the speed of the vehicle.
- Left Hand Turn Indicator: Indicates that the vehicle is turning left.
- Charging Port Connected Indication: Indicates that the battery charging cable is connected to vehicle.
- Bluetooth: Indicates that the vehicle is connected to mobile through Bluetooth.
- Position Light: Indicates that the position lamp is ON.
- Service Reminder: Indicates that the next service due.
- Side Stand ON: Indicates that the side stand is in open position.
-
Clock (12 & 24hr format): Indicates time. Refer the below procedure to adjust the clock time.
- Switch ON the vehicle. Use the M button to display SOC.
- Long press M button till the hour digits start blinking. Short press M button to adjust hour digits.
- Long press M button till the minute digits start blinking. Short press M button to adjust minute digits.
- Long press M button till the AM/PM start blinking. Short press M button to adjust AM/PM.
- Power Bars: Indicates the amount of power drawn by the vehicle.
- High Beam: Indicates that the head lamp is in high beam.
- High Temperature (Li-Ion Battery): Indicates high temperature of lithium-ion battery. In this condition the vehicle will slow down. In case of charging only cooling fan ON.
- Regenerative Braking indication: Indicates that the regenerative braking is ON.
- Right Hand Turn Indicator: Indicates that the vehicle is turning right.
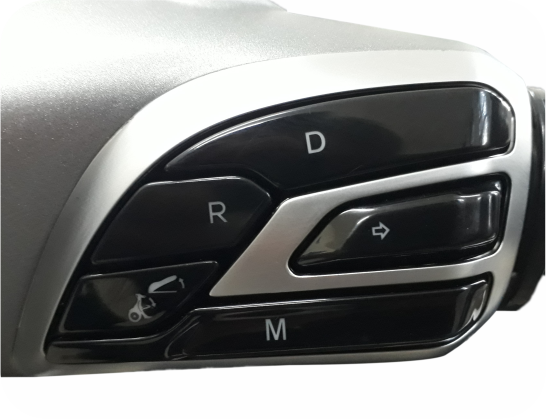
Control Switch Right Hand
- Pull any brake lever. Short press D for Drive mode with throttle fully released.
- While running, you can toggle between Sport & Eco modes with short press D.
‘M’ is the mode selection switch that enables display of information on speedometer cluster as follows, by sequential pressing.
- Odometer
- Trip distance
- State of Charge for battery.
- Time required to charge the battery to full capacity (will be displayed only during charging)
- If running, bring the vehicle to complete rest. Pull any brake lever. Long press R for Reverse Mode. The beeper sound will start & will continue till in Reverse mode. The maximum speed in reverse mode is 3.0 kmph. You can exit reverse mode by changing to Drive mode as mentioned above or by changing to Neutral mode (refer “How to ride your Vehicle”)
 )
) - When the Right Hand turn signal indicator button is pressed, Right turn signals flash ON & OFF. Flashing stops automatically when the turn is complete, and handlebar is straightened. It can also be stopped by pressing the button again. It also goes OFF when the Left side indicator button is pressed for Left turn.
 )
) - Long Press to open the seat. Seat opens slowly and rests at a point. The beeper sound will start & will continue till seat is open. While closing the seat press on the driver seat area above the seat lock.
- Short press to open Glove box. It does not open while vehicle is running. While closing, press by hand gently on the top.
- Both seat and glove box can be opened only when the vehicle is not moving & in the presence of key only.
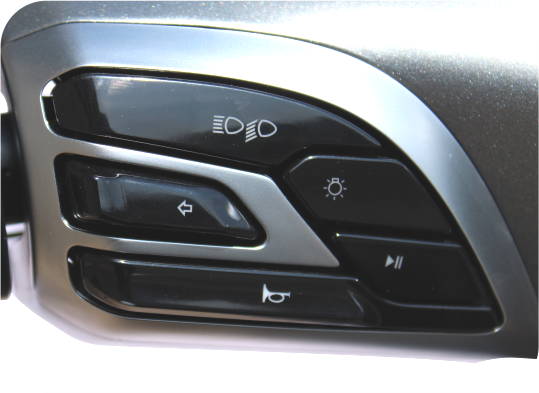
Control Switch Left Hand
 )
) - Daytime Running Light glows automatically once the vehicle is switched on.
- Press the headlight button to switch ON the Headlight. Once the headlight is ON the Daytime Running Light gets dimmed into Front Position Lamp
- To switch OFF the headlight, press the button again.
- Once the headlight is OFF, the Daytime Running Light will glow again.

 )
) - When headlight is ON, High or Low beam can be selected with this button. High beam indicator light located on Speedo console will glow when high beam is selected.
High Beam
Low Beam
 )
) - Press Horn button for sounding Horn.
 )
) - When the Left Hand turn signal indicator button is pressed, left turn signals flash ON & OFF. To stop flashing, press the button again. It will be automatically switched OFF after turning. It also goes OFF when the Right side indicator button is pressed for Right turn.
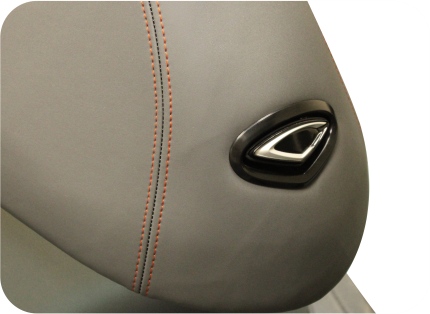
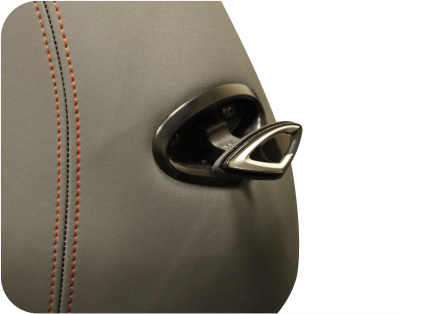
Utility Hook
- Convenient utility hook provided for light small bags.
- It pops out when pressed & slides back tuck in place with next press.
- The hanging load capacity is 3 Kg.
- However, it is recommended to rest the load on floorboard.
Warning:
Hook is not suitable for heavy items.
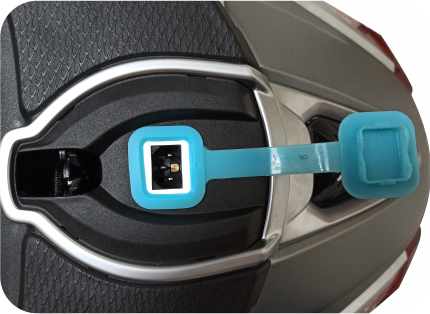
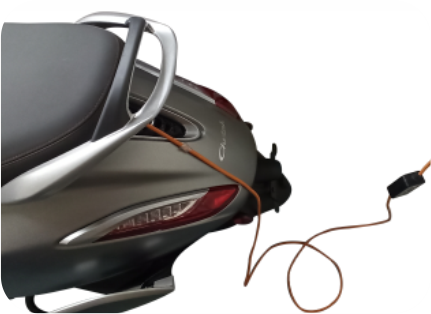
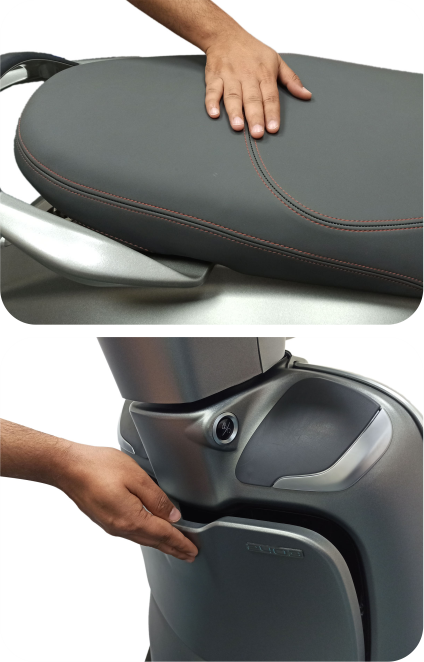
Lithium-Ion battery charging port
- The charging port is used to connect the charging cable to charge the Lithium-Ion battery.
- The seat has been designed in such a way that the seat can be locked after the charging cable is connected and the vehicle is getting charged. Seat locking also helps in pressing down & engaging the charging plug into the socket & prevents loose connection. As such, seat locking may need higher effort in this case.
- Always ensure that the charging plug is fully inserted in charging socket. The cable can not be removed, till the seat is unlocked.
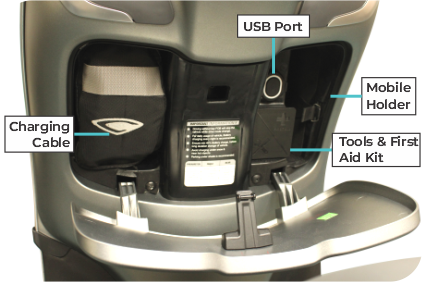
Glove box
Glove box accommodates:
- Mobile holder.
- Illuminated USB port for Mobile Charging: Mobile phone charging is possible while vehicle is turned on and while running. Do not leave the mobile phone inside the vehicle unattended
- Tool Kit & First Aid kit
- Vehicle Charging Cable Assembly
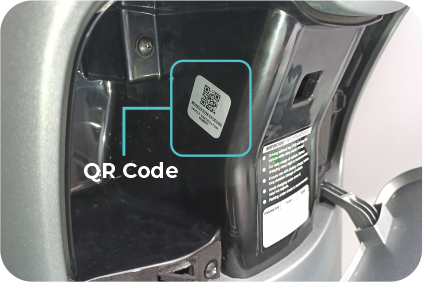
- QR Code
The charging cable has been kept inside the glove box. Use this for charging the Lithium-Ion battery. Once the charging is over, keep the charging cable at the specified location. Orientation arrow have been provided on charging cable bag.
Warning:
Never keep any hot or inflammable items inside the Glove box.
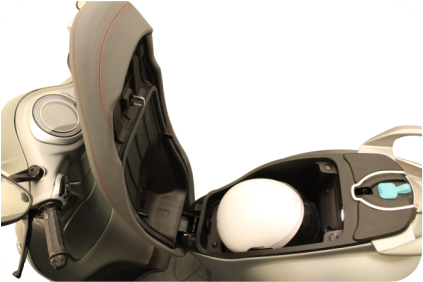
Helmet Box
- This space has a maximum carrying capacity of 10 Kg.
- A half face standard helmet can be accommodated inside helmet box.
- Once the helmet box is opened the lamp inside will glow with continuous beep sound
- There is additional space around the helmet that can accommodate articles like small Diary, Eye wear Case, Pouch, Scarf, small water bottle etc.
Warning :
Never keep any hot or inflammable items inside the helmet box.
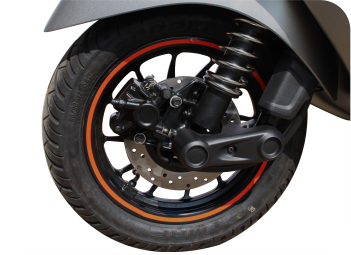
Tubeless Tyres
The main advantage of tubeless tyres is in case of puncture the rate of air leak is very slow, hence the vehicle can be easily driven up to nearest puncture repair shop.
Wheel Puncture
- Visit nearest known tubeless tyre repair shop to remove puncture.
- Remove puncture by Filler or Plug method only.
- Do not use patch method to remove puncture of tubeless tyre.
The walls of the tubeless tyres in contact with the wheel rim should not be damaged in any way during fitment / removal of tyre. The tyre side walls in contact with wheel rim seals air.
Replace worn out tyres:
- Safety is a concern in case of worn out tyres as tyre grip will be compromised. This will affect the drive-ability as well as braking efficiency.
- When tyres wear, the risk of punctures will be higher too as sharp stones can easily pierce through the thin walls.
Tyre Pressure:
Keep appropriate tyre pressure as mentioned below to increase life of the tyre.
| Scooter | Front | 22 psi |
| Rear (solo) | 29 psi | |
| Rear (with pillion) | 34 psi |
Consequences of lower than recommended tyre pressure:
- Lower speed.
- Greater danger of damaging a rim.
- Higher rolling resistance.
- Higher consumption of battery energy.
- Inconsistent tyre wear.
Consequences of higher than recommended tyre pressure:
- May cause the tyre to rupture.
- The ride will be uncomfortable/hard.
- Cornering is less safe.
- Inconsistent tyre wear.